Procreate’s grid tool and its reference tool do not talk to each other. The 2D Grid, under Actions > Canvas > Edit Drawing Guide, draws only on your canvas. The Reference Companion, toggled from Actions > Canvas > Reference, shows a photo in a floating window with no grid of its own. If you want a gridded reference photo to paint from, Procreate has no feature that does it directly.
This sounds like a small gap until you actually try to transfer a photo’s proportions onto a digital canvas. Then it is the whole problem.
The 2D Grid only ever touches your canvas
Procreate’s 2D Grid lives under Actions > Canvas > Edit Drawing Guide. Turn it on and you get a set of lines over your canvas with a color picker, an opacity slider, a thickness slider, and one control for grid size, plus a “Drawing Assist” toggle that snaps your strokes to the lines once you start drawing, according to Procreate’s own handbook page for drawing guides. You can move the whole grid with a drag node and rotate it with another. It is a genuinely useful tool for keeping perspective and alignment honest while you draw directly on the canvas.
What it cannot do is apply to an imported photo. The 2D Grid is a canvas guide. It has no concept of “the reference image,” because in Procreate’s interface, the reference image does not live on the canvas at all. It lives somewhere else entirely.
The Reference Companion only ever shows a photo
That somewhere else is the Reference Companion, a separate floating window you open from Actions > Canvas > Reference. According to Procreate’s Reference Companion help page, you can drag its handle to reposition it, drag a corner to resize it, pinch to zoom, and pan around inside it exactly like panning the canvas. On an iPad with a TrueDepth camera or an A12 chip or later, the same window gains a Face button that turns on FacePaint, which projects whatever is on your canvas onto your face through the front camera using augmented reality.
That is a genuinely clever piece of engineering, and it solves a real problem: seeing your reference without covering your canvas. But read the feature list again. Resize, pan, zoom, FacePaint. Nowhere in it is a grid, and nowhere in it is a way to crop the photo to your canvas’s aspect ratio before you start painting. The Reference Companion is a viewing window, not a measuring tool.
Two good tools, and a gap exactly between them
Put the two together and you get the actual problem. Procreate gives you a grid that lives on your canvas and a reference viewer that lives in its own window, and it has no feature that connects them. You cannot open a photo in the Reference Companion, turn on the 2D Grid, and see a grid drawn over the photo. The grid stays on the canvas. The photo stays in its window. They are two different surfaces in the app, and Procreate never asks them to overlap.
There is a workaround, and most Procreate painters who grid at all have used some version of it: import the reference photo as its own layer in your canvas’s layer stack, drop that layer’s opacity down to something you can see through, and turn on the 2D Grid over the whole canvas. This gets you a grid and a faint photo in the same view. It also comes with three costs. First, the grid you are looking at is a canvas-wide guide, not something scoped to the photo layer, so if you want to trace the reference and then hide the grid, or vice versa, you are toggling a setting meant for something else. Second, you still have to manually crop or resize that photo layer to your canvas’s proportions yourself before it goes in, because nothing in the flow does it for you. Third, you have now spent your canvas’s real layer budget and your working attention on a setup step, before you have made a single mark that ends up in the finished painting.
This is not a guess. Painters have asked Procreate for exactly this
If this felt like an obvious feature to add, it is because a lot of Procreate users have thought the same thing and said so on the record. Procreate’s own community forum, Procreate Folio, has open, unresolved feature request threads asking for precisely this combination: a discussion titled “Reference image with overlying grid”, a separate one titled “Reference Mode Grid”, and a third, broader one titled “Reference image feature improvements”. All three exist on Procreate’s official forum today, filed under the section where the community requests and votes on features. None of them describe a shipped feature. They describe a want.
That is worth sitting with for a second. This is not a workflow quirk that only bothers people who set up their canvas wrong. It is a specific, repeatedly requested feature that Procreate’s own users keep asking the company to build, because the two tools they already have almost do the job and then stop just short of it.
It is not only a Procreate problem
Procreate is not uniquely at fault here. Clip Studio Paint, another major painting app, has the same shape of limitation. Its grid, turned on through View > Grid, and configured in Preferences, is a canvas overlay with its own color, opacity, and spacing settings, entirely separate from any reference image feature, according to Clip Studio Paint’s own manual page on the ruler bar and grid. Grid a reference image and grid your working canvas in Clip Studio Paint, and, as with Procreate, you are drawing two separate grids by hand and trusting yourself to keep them matched.
Most digital painting apps treat “grid” and “reference” as two different jobs handled by two different tools, because historically that is how the features were built: the grid grew out of perspective and alignment guides for drawing directly on the canvas, and the reference viewer grew out of wanting a second window for a photo. Nobody designed them to be the same feature, so in most apps, they are not.
Why this actually matters more on a screen than it did on paper
Painters have gridded photographic references since long before digital painting existed, usually printed on paper, sometimes taped to an easel. On paper, a black grid line reads clearly against almost anything, because the paper reflects a roughly constant amount of ambient light no matter what is printed on it.
A reference photo on a screen does not behave the same way. A screen is backlit, not reflective, and its actual brightness and contrast swing far more than a printed page’s ever could: a photo of a bright sky next to a dark forest can vary from near-white to near-black on the same panel, at whatever brightness you have your display set to, in whatever room lighting you happen to be working in. A single fixed grid color, say black or white, that looked fine over one reference photo will vanish into a dark corner of the next one. This is a problem that is genuinely worse on a screen than it ever was on paper, which is exactly why a grid that reads its image and adjusts its own color to stay visible matters more for digital painting than the traditional pitch for the same feature ever let on.
Match the canvas before you grid, in pixels, not inches
The other classic grid mistake, gridding a reference before matching its proportions to your working surface, also needs a different translation for a digital canvas. Every painting tutorial written for a physical canvas tells you to check your centimeters or inches. On an iPad, there is no canvas with a ruler. There is a canvas with pixel dimensions, and a reference photo with its own, usually completely unrelated, pixel dimensions and aspect ratio.
If your working canvas in Procreate is set up at a 4:5 ratio and your reference photo comes off your camera roll at 3:4, gridding the photo as it stands and copying it square by square distorts the transfer, exactly the way it would with a mismatched printed canvas, just measured in pixels instead of centimeters. The fix is the same fix painters have always used, cropping the reference to the canvas’s proportions before the grid goes on, only now “the canvas” means the pixel dimensions of your Procreate document, not a stretcher bar.
The workflow: grid on one side, paint on the other
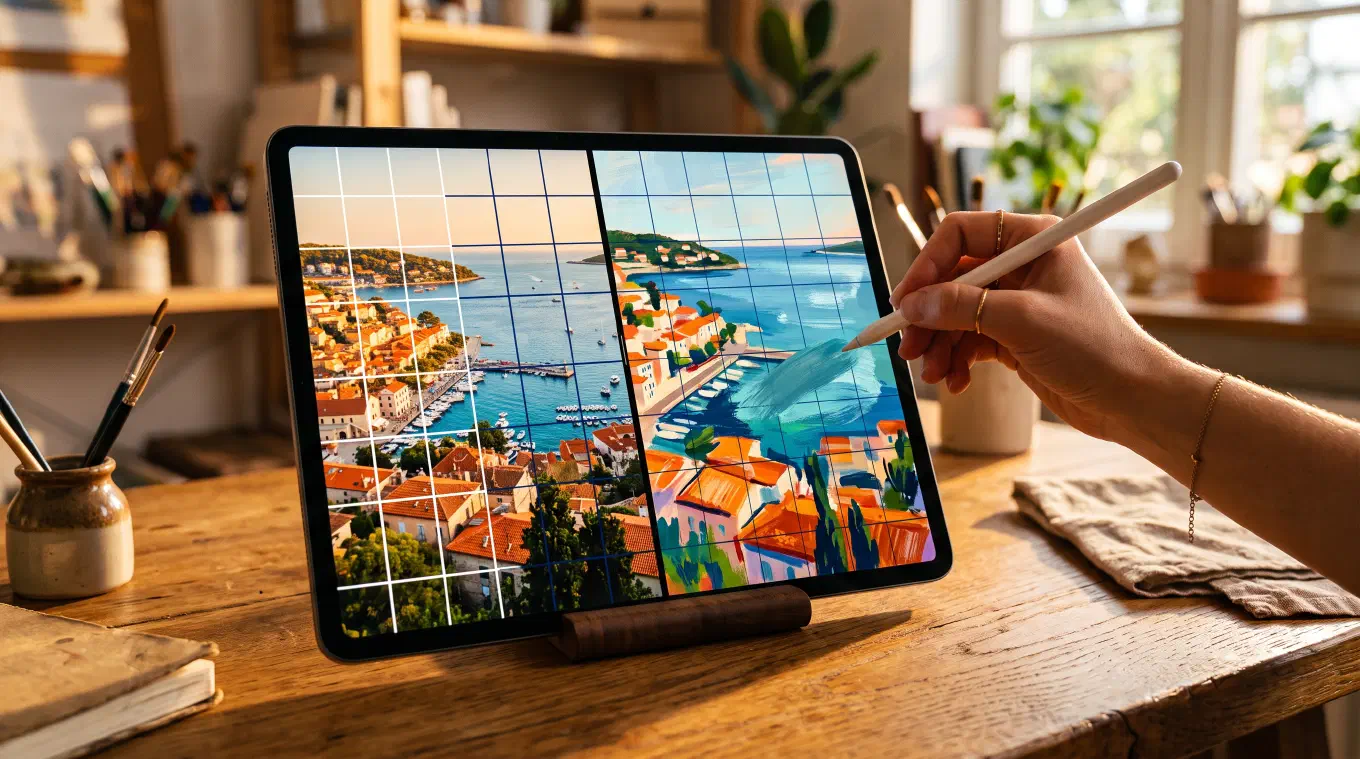
The actual fix for all of this does not require Procreate to ship a new feature. iPadOS already gives you the tool to run two apps at once. Split View puts two apps side by side on the screen, and on newer iPads, Stage Manager adds resizable, overlapping windows for up to four apps simultaneously. Either one lets you put a grid app in one window and your painting app in the other, at the same time, on the same screen.
Overgrid is built to be the app in that first window. Import your reference photo, crop it to match your canvas’s aspect ratio, whether your target surface is a physical canvas, a print, or, as Overgrid’s own product description puts it, a screen, and apply an adjustable grid on top with a color you set yourself, or let the adaptive contrast grid pick a color that reads clearly against that specific photo automatically. Put Overgrid in Split View or a Stage Manager window next to Procreate, Adobe Fresco, or any other painting app, and you have a gridded, correctly cropped reference sitting beside your canvas the entire time you paint. No layer trick, no toggling a canvas-wide guide meant for something else, no manual aspect-ratio math to get right before you start.
Overgrid runs on iPad, iPhone, Mac, and Android, with no account, no cloud upload, and no ads. It offers a free working grid, and a one-time purchase, not a subscription, unlocks the full color picker, the adaptive contrast grid, and the rest of its analysis tools. Your reference photos stay on your device, whichever painting app you put next to it on screen.
The grid still solves the same problem it always did
None of this changes what a grid actually does. It still only answers where things go. Every decision that makes a painting good, line quality, edge decisions, value, color, still happens entirely in your hand once the proportions are placed correctly. For the full technique, its nearly four-thousand-year history, and the scaling math behind it, read the complete guide to the grid method. If you are looking for grid options beyond Procreate specifically, including free desktop and browser tools, see how to add a grid to a photo.
What changes, moving from paper to an iPad screen, is where the friction actually lives. It used to be the ruler and the printer. Now it is two good, well-built Procreate features that were never designed to meet each other. Running a dedicated grid app beside your painting app closes that gap without waiting for either app to change.