The grid method is a technique for transferring an image from a reference to a canvas while keeping proportions accurate. You overlay a grid on the reference, draw a matching grid on your canvas, and copy the contents one square at a time. Artists have used it for over 3,000 years, from ancient Egypt to modern hyperrealism. This guide covers everything: history, technique, scaling, common mistakes, and the digital tools that have replaced the ruler. And if you are wondering whether the grid method is cheating, the short answer is no, and the long answer has three millennia of evidence behind it.
Why the grid method exists
Painting is full of hard problems. Mixing the right color. Getting the values right. Making edges feel alive. These are the problems worth spending your time on.
Proportion is also hard, but it is hard in a boring way. Getting the eyes two millimeters too far apart does not make a painting more expressive. It makes it wrong. The grid method exists to solve the boring problem so you can focus on the interesting ones.
The principle is simple. Divide your reference image into a grid of squares. Draw the same grid on your canvas. Then transfer the image one square at a time. Instead of trying to place an eye in the correct position on a 24x30 inch canvas, you only need to place a small curve in the right spot within a 3-inch square. The task goes from overwhelming to manageable.
This is not a shortcut. The grid does not draw for you. It tells you where things go. What you do inside each square, the line quality, the sensitivity of the curves, the decisions about what to include and what to leave out, that is still entirely yours.
A 3,500-year history
The grid method is older than oil painting, older than canvas, older than most of the tools artists use today.
Ancient Egypt
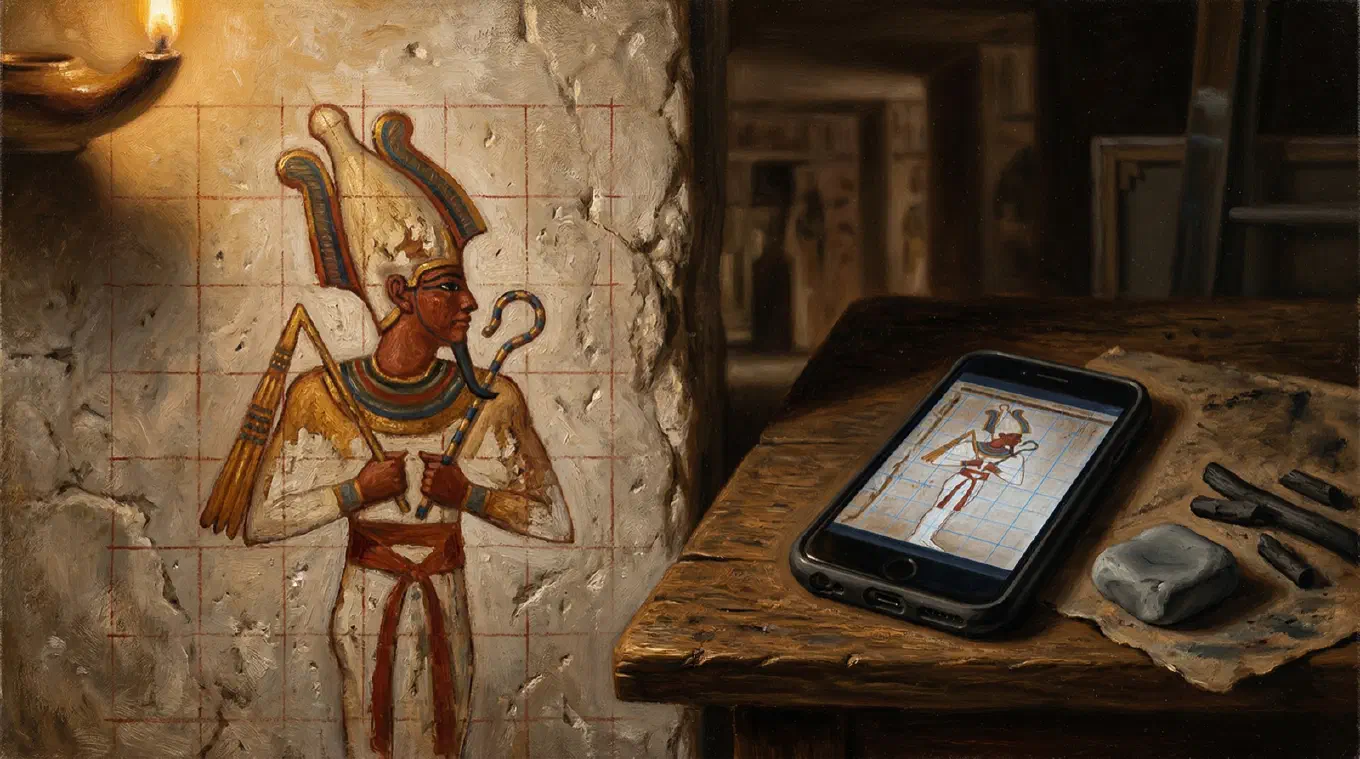
The earliest known proportional grids appear in Egyptian art from the 12th Dynasty, around 1900 BCE. Egyptian artists used a system of 18 horizontal units from the soles of the feet to the hairline to standardize the human figure across tomb walls, temples, and monuments. These were not creative guidelines. They were a proportional system that ensured consistency across large-scale works, often executed by teams of artists working on different sections of the same wall. Traces of grid lines survive on unfinished tomb paintings, where the final layer of paint never covered the underlying construction marks.
The Renaissance
The grid became a perspective tool in the hands of Renaissance artists. Albrecht Durer documented several drawing devices in his 1525 treatise Underweysung der Messung. One of the most famous is a wooden frame strung with a grid of threads, placed between the artist and the subject. The artist looked through the grid and transferred what appeared in each cell onto a corresponding grid drawn on paper. Durer published woodcuts illustrating these devices, and they became widely known across Europe.
Leon Battista Alberti described a similar approach in his 1435 treatise De Pictura, using a thin veil divided into squares as a drawing aid. The concept was the same: break the visual field into manageable units and transfer them systematically.
Whether Vermeer used a camera obscura, a grid, or both remains debated among art historians. What is not debated is that proportional transfer tools were standard workshop equipment throughout the Renaissance and Baroque periods. Three centuries after Durer, Van Gogh built his own perspective frame on the same principle and leaned on it constantly during his early years.
The 20th century
Chuck Close made the grid his signature. Working from gridded photographs, Close built monumental portraits by filling each cell with abstract patterns of color that resolve into photorealistic faces when viewed from a distance. His process was methodical: start at the top left, work across, move down. The grid was not a preliminary step to be erased. It was the structure of the finished painting.
Norman Rockwell used projectors. Photorealists like Richard Estes used grids and photographs. The tools changed, but the principle stayed the same: separate the problem of what to paint from the problem of where to put it.
How the grid method works
Step 1: Choose your reference
Start with a clear, high-resolution reference image. The grid method works with any subject: portraits, landscapes, still life, animals. The important thing is that the reference is sharp enough to read at the detail level of each grid square.
Step 2: Match your aspect ratios
This is the step most beginners skip, and it causes the most frustration. Your reference photo and your canvas must have the same aspect ratio before you grid either one. If your canvas is 2:3 and your photo is 4:5, the transfer will be distorted no matter how careful you are.
Crop the reference to match the canvas, or choose a canvas that matches the photo. Get this right before you draw a single line.
Step 3: Draw the grid on your reference
Divide the reference into equal rows and columns. The number of divisions depends on the complexity of the subject. A simple landscape might need 3x4. A detailed portrait might need 8x10 or more. Use equal squares when possible. They are easier to work with than rectangles.
If you are working with a printed photo, draw the grid with a fine pen and a ruler. If you are working digitally, an app like Overgrid overlays the grid on your photo instantly. Set the number of rows and columns, adjust the line weight and opacity, and the grid is done. Change it as often as you want. No ruler marks to live with.
Step 4: Draw the grid on your canvas
Replicate the same grid on your canvas. Same number of rows, same number of columns. The size of the squares will be different because the canvas is a different physical size, but the ratio must be identical.
Draw lightly. Use charcoal, a hard pencil (2H or 4H), or a charcoal pencil. You want lines that are visible while you work but disappear under paint or erase cleanly when you are done.
For large canvases, a chalk line or a long straight edge helps keep the lines accurate over several feet.
Step 5: Transfer one square at a time
This is where the method earns its reputation. Look at the contents of one grid square on your reference. Find the same square on your canvas. Draw only what you see in that square.
Focus on shapes, not objects. You are not drawing “an eye” or “a tree.” You are drawing a curve that enters the square from the left edge about one-third of the way down and exits through the bottom edge near the center. When you think in terms of abstract shapes and their positions relative to the grid lines, the transfer becomes mechanical. And mechanical, in this context, is a good thing.
Pay attention to where lines cross grid edges. If a contour crosses the midpoint of the left edge of square B3 in your reference, it must cross the midpoint of the left edge of square B3 on your canvas. These crossing points are your accuracy checkpoints.
Step 6: Remove the grid
Once the transfer is complete, erase or paint over the grid lines on your canvas. If you drew them lightly enough, they will be invisible under the first layer of paint. For drawings, a kneaded eraser lifts graphite or charcoal grid lines without disturbing the transferred image.
On your reference photo, there is nothing to erase if you used a digital overlay. The original image file stays untouched.
Scaling with the grid method
The grid method’s real power is scaling. Transferring a photo to canvas at 24x36 inches is the same process as transferring it to a same-size drawing. The number of squares stays the same. Only the size of each square changes. For the full workflow on very large surfaces, see how to scale up a drawing.
The math
If your reference is 8 inches wide with an 8-column grid, each square is 1 inch wide. If your canvas is 24 inches wide with the same 8-column grid, each square is 3 inches wide. The scale factor is 3:1. Every position within a reference square maps to the corresponding position in the canvas square at 3x the size.
This works at any scale. Muralists use grids to transfer sketches to walls several stories tall. The method scales linearly. If it works at 2x, it works at 20x.
Real-life size mode
When you know your physical canvas dimensions and want the grid to match exactly, you need a grid calculated from real measurements, not from arbitrary row and column counts.
Overgrid has a real-life size mode where you enter your canvas width, height, and desired square size in centimeters or inches. The app calculates the rows and columns automatically. A 40x60 cm canvas with 5 cm squares gives you an 8x12 grid. Change the square size and the grid recalculates. This eliminates the mental math and ensures the grid on your phone matches the grid on your canvas exactly.
Common mistakes
Mismatched aspect ratios
The most common source of distortion. If the reference is 4:5 and the canvas is 2:3, the grids will not correspond correctly. Always crop the reference to match the canvas first.
Grid too coarse for the subject
A 3x3 grid works for simple compositions but falls apart with complex subjects. If you find yourself guessing where things go inside a square, the grid is too coarse. Add more divisions.
Grid too fine for the subject
The opposite problem. A 20x20 grid on a simple landscape creates busywork. More squares means more lines to draw and more lines to erase. Match the grid density to the complexity of the subject.
Drawing symbols instead of shapes
The brain wants to substitute symbols for observation. It wants to draw “an eye” instead of the actual shapes you see. The grid helps fight this tendency by reducing your field of view to a single square, but you have to cooperate. Look at the shapes. Draw the shapes. Not the name.
Squaring off curves
When curves pass through grid lines, there is a tendency to break them into straight segments aligned with the grid. This makes portraits look stiff and mechanical. The grid lines are reference points, not straightedges. Let your hand follow the curve naturally, using the grid only to check position.
Heavy grid lines on the canvas
Grid lines that are too dark or too deep leave marks that show through paint. Use the lightest touch that is still visible. Charcoal vine, hard graphite, or a chalk pencil work well. Soft graphite (2B and above) can smear and resist coverage.
Not checking your work
The grid is a guide, not a guarantee. After transferring, step back and look at the drawing as a whole. Do the proportions read correctly? Does the composition feel right? Correct any drift before you commit paint.
Digital grids vs. manual grids
The traditional approach requires printing the reference photo, drawing the grid with a ruler, and committing to that grid for the duration of the project. If you want to change the grid, you start over with a new print.
Digital grid apps eliminate this friction. You import a photo, set the grid parameters, and see the result immediately. Change the number of divisions, the line color, the opacity, the weight. Try different configurations until one fits the subject. No rulers, no wasted prints, no permanent marks.
What to look for in a grid app
A good grid app should do a few things well.
Adjustable divisions. You need control over rows and columns. Different subjects need different grids.
Line visibility. A grid that disappears against the image is useless. The app should let you change the color, weight, and opacity of the lines. Even better: adaptive contrast that automatically picks a visible color based on the underlying image tones.
Aspect ratio cropping. The app should crop the reference to match your canvas before applying the grid. This is the step that prevents distortion.
Export. You need to get the gridded image out of the app and onto a screen or a print next to your easel.
Value studies. Not strictly a grid feature, but a value study that reduces your reference to 3 to 5 tonal levels helps you plan light and shadow before you start painting. Having this alongside the grid saves switching between apps.
Overgrid
Overgrid is built specifically for this workflow. It is a grid drawing app for painters, available on iOS and Android.
The grid supports 1 to 40 rows and columns, adjustable line weight (1 to 20), and opacity from subtle to solid. Intersection modes include lines, dots, and crosses. Diagonal lines and cell numbering help with composition analysis and orientation on large canvases. Square mode forces equal squares when you need them.
Six curated grid colors are included free: white, black, red, blue, yellow, and gray. Premium unlocks a full RGB color picker and adaptive contrast, which analyzes the image and picks a grid color that stays visible against any background.
Beyond the grid, Overgrid includes value studies (2 to 8 tonal levels) and a temperature overlay that maps warm and cool zones across the composition. Presets let you save grid configurations and apply them to new projects with one tap.
The free version is a working tool: grid overlay, six colors, 1024px export, and up to 3 projects. Premium is a one-time purchase for everything, including unlimited projects and full-resolution export up to 4096px. No subscription.
All images stay on your device. No account, no cloud, no ads.
The “is it cheating?” question
This question comes up in every forum, every art class, every comment section. The answer is no, but the reasoning matters more than the answer.
The grid method is a proportional transfer tool. It solves one specific problem: where things go. It does not solve any of the problems that make a painting good. It does not mix your colors. It does not tell you how to handle an edge. It does not decide which details to include and which to leave out. It does not create the sensitivity that separates a painting from a photocopy.
Durer used grids. Alberti recommended them. Chuck Close built an entire body of work around them. Egyptian artists standardized their figures with proportional grids for two millennia. The idea that “real” artists work without any tools is a romantic myth with little historical support. The 19th-century academic tradition emphasized freehand drawing as a virtue, but that tradition is one chapter in a much longer story.
The grid is a tool. Like a mahl stick, a plumb line, or a color checker. Use it when it helps. Skip it when it doesn’t.
When to use the grid method
The grid method is most useful when:
- Transferring a photo reference to a canvas at a different scale
- Working on a complex composition where proportional accuracy matters
- Painting from a reference that must be reproduced precisely (commissions, portraits)
- Scaling a small sketch to a large surface (murals, large canvases)
- Teaching observational drawing (the grid forces students to see shapes, not symbols)
It is less useful when:
- Working from life (the grid requires a static reference image)
- Painting alla prima from imagination
- Doing gesture drawings or loose studies where speed matters more than precision
Beyond the grid: value studies and temperature
A grid tells you where things go. A value study tells you how light falls.
Reducing a reference to a limited number of tonal levels, typically 3 to 5, strips away color and detail and reveals the underlying structure of light and shadow. This is the foundation of a strong painting. If the values do not work, no amount of color accuracy will save it.
Temperature mapping does something similar for color. It identifies the warm and cool zones in a composition, showing where warm light advances and cool shadow recedes. Planning these relationships before you start painting leads to more cohesive color harmony.
Both techniques pair naturally with the grid method. Grid the reference, study the values, map the temperatures, then paint. Each step removes uncertainty before you commit paint to canvas.
Overgrid generates value studies from 2 to 8 tonal levels and temperature overlays from any photo. Combined with the grid, it is a complete reference preparation tool.