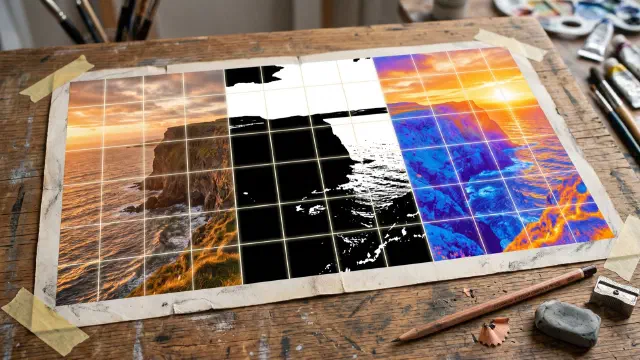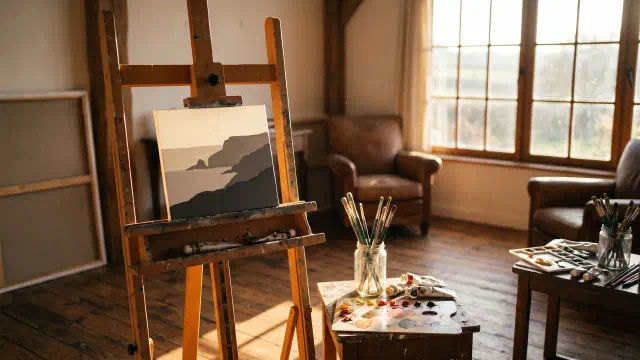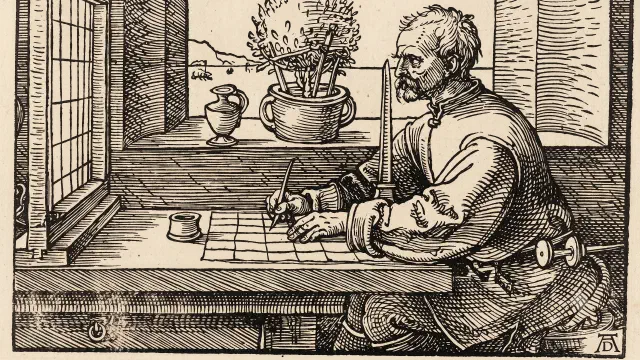
To grid a wall for a mural, measure the wall, crop the design to the wall’s proportions, and choose a square size that divides the wall into whole numbers. Snap one level line and one plumb line, measure every mark from those two, snap the grid in temporary chalk, label the squares A1, B1, and copy the design square by square.
That is the whole method. The rest of this guide is about where it goes wrong on a wall, because a wall is not a big canvas. It is not level, it has windows, it is outdoors, and every mistake costs a ladder climb and a coat of primer. The general scaling math is covered in how to scale up a drawing. This post is only about the wall.
Plan the grid in real units before you touch the wall
A mural grid is planned on paper and only executed on the wall. Decide three numbers first: the painted width, the painted height, and the square size. Everything else follows from them.
Start with a tape measure, not a photo. Measure the exact area the mural will cover, and decide where it stops. The edge of a wall is rarely the edge of the mural: a downpipe, a sign, a door frame, or a plinth often sets the real boundary.
Then divide. If the mural is 640 cm wide and 280 cm tall, 40 cm squares give you exactly 16 columns and 7 rows, 112 squares in total. In feet, a mural 21 feet wide and 9 feet tall takes 1 foot squares as 21 columns and 9 rows. Whole numbers matter here. A square size that leaves 14.2 columns means a thin partial column at one edge, which you will have to account for on both the design and the wall, and which is the easiest place to lose count.
Pick units you can measure with. Metric divides more cleanly on a tape than feet and inches, so if your tape has both, plan in centimetres.
Match the design to the wall: crop it or leave a margin
The design and the painted area must have the same proportions, or the mural stretches. A wall is almost never the shape of your sketch. The 640 by 280 cm wall above has a ratio of about 2.3 to 1. A sketch on a standard sheet is closer to 1.4 to 1. You have two honest options.
Crop the design to the wall. Keep the full width and cut the top and bottom of the design until it has the wall’s proportions. This works when the design has background to spare, a sky, a field, a pattern that can lose a strip.
Keep the design whole and leave a margin. Fit the design to the wall’s height and let the rest of the wall become background. A 1.4 to 1 design painted 280 cm tall is about 390 cm wide, which leaves 250 cm of wall to fill with an extended background or plain color. You then grid only the design area.
What you cannot do is grid a 1.4 to 1 sketch and a 2.3 to 1 wall with the same number of squares. Every square becomes a rectangle, and every face in the mural gets wider. If the design must change shape, redraw it at the wall’s proportions before you grid anything.
Choose the square size by the detail, not by the wall
The square size is decided by the most detailed part of the design. A rule of thumb that works: the smallest thing that has to look right, a face, a hand, a word, should span at least two or three squares across. Below that, you stop copying and start drawing from memory, which is what the grid exists to prevent.
Take the 640 cm wall. With 40 cm squares, a face painted 50 cm wide sits inside barely more than one square. With 20 cm squares it spans two and a half, and you get crossing points through the eyes, the nose, and the mouth. The cost is the square count, which quadruples from 112 to 448, and every one of them has to be snapped, labeled, and later covered.
You do not have to choose one size for the whole wall. Keep the coarse grid everywhere, and split only the detailed squares into four smaller ones, on both the design and the wall. Or draw diagonals through those squares, which gives you the center point and two more lines to measure against without any extra measuring. The Georgia Chalk Artists Guild describes the trade: one member works in 1 foot squares, another in half-foot squares, and the smaller squares are more accurate but easier to get confused in.
Lay out a level, square grid on the wall
A mural grid is only as true as the first two lines you put down. Everything is measured from them, so they get the care.
1. Snap a level datum line
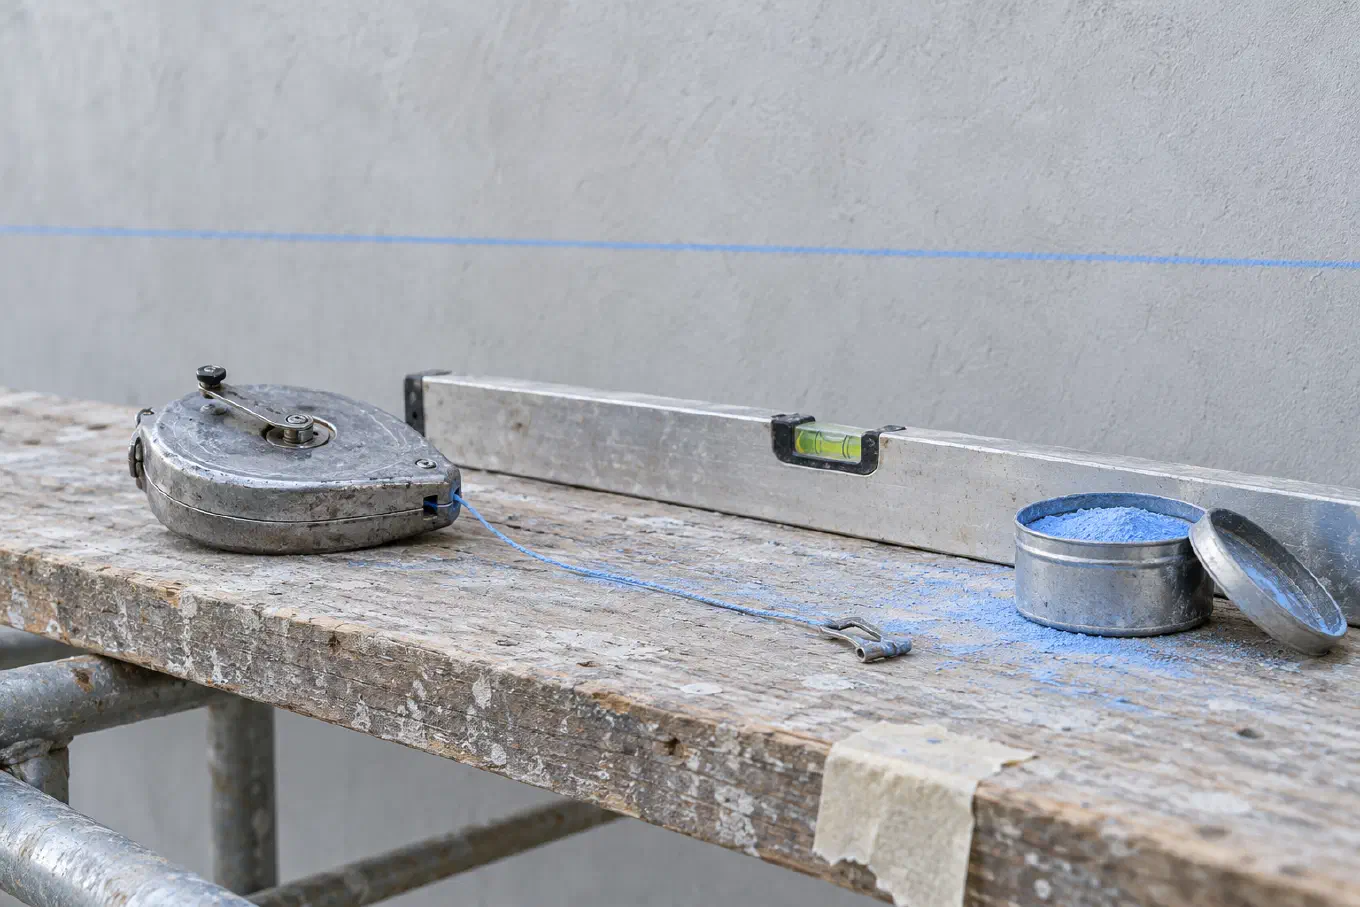
Do not measure from the floor, the ceiling, the pavement, or the top of the wall. None of them is reliably level, and a grid built off a sloping pavement carries the slope across the entire mural. Instead, snap one horizontal line with a spirit level or a laser level, usually at the bottom edge of the mural or at a height you can reach comfortably. This is your datum. Every horizontal line in the grid is measured from it.
A laser level is the fastest way to get a long level line indoors. Outdoors it often fails: Pandr Design Co. notes in their guide to painting straight lines on murals that laser beams can be hard to see in bright daylight, and that a chalk line or a manual level is more practical outside. Use the laser in shade or low light, mark its line with short ticks every metre, and snap the chalk through the ticks.
2. Drop one plumb vertical
At the left edge of the mural, or at its center on a very wide wall, drop a vertical line with a plumb bob or a long level and snap it. Then check that it meets the datum at a true right angle with a 3-4-5 triangle: mark 60 cm along the datum from the corner, 80 cm up the vertical, and the distance between the two marks must be exactly 100 cm. Any multiple works, 3, 4, and 5 feet, or 90, 120, and 150 cm for more precision on a large wall.
3. Measure every mark from the same origin
This is the step that keeps a big grid square. Hook the tape once at the corner and read every mark off the same pull: 40, 80, 120, 160 cm. Never measure 40 cm, move the tape, and measure the next 40 cm. A millimetre of error per square becomes two centimetres across a 20-square wall.
Do the same along the top edge, measuring from the same vertical, and up both sides, measuring from the datum. The Georgia Chalk Artists Guild teaches exactly this order for large pavement pieces: mark the bottom edge from the left corner, the top edge from the left corner, then both sides from the bottom. Because every mark comes from a fixed origin, a slightly short tape reading stays a local error instead of spreading.
4. Snap the lines between matching marks
Snap each line between its two matching marks with a chalk line pulled tight and lifted straight out from the wall, not at an angle, or the line lands offset. Long lines are a two-person job: one holds each end, or one holds the middle down while the other snaps each half. On a tall wall, do it from a scissor lift or scaffold with a partner rather than stretching from a ladder.
5. Check the diagonals
When the outer rectangle is down, measure both of its diagonals. If they match, the grid is square. If they differ, the rectangle is a parallelogram, and it is far cheaper to find out now than after the outlines are drawn.
Windows, doors, and pipes
Run the grid straight through them. Count the squares that fall on glass or a door as squares, label them, and leave them empty. If you skip them, the count shifts and every square to the right is wrong. Measure the openings onto your design too, so you know before you start which parts of the image will be interrupted.
Brick and rough render
Texture breaks a snapped chalk line into dashes and swallows it in the mortar joints. On brick or rough render, mark the intersections more heavily, with a short painted cross or a piece of tape, so you can read the grid even where the line between them disappears. You do not always need the full lines at all. Miriam Hellmann of OFFWRLD Murals, in her comparison of six mural transfer methods, calls the grid “very accurate” but slow to draw, and recommends tape marks as guides rather than drawing the entire grid.
Pick a chalk that will not bleed through your paint
Chalk color is a permanence choice, not a style choice. Layout chalk is made to last for different lengths of time, and the long-lasting kinds are designed to survive weather, which also means they survive paint.
Irwin publishes a permanence scale for its Strait-Line chalk, from least to most permanent:
- Dust-Off (light violet): for interior walls and trim, wipes away cleanly, and Irwin says it eliminates the need for priming before painting.
- Standard (blue and white): temporary marking chalk, indoor and outdoor.
- Hi-Visibility (yellow, orange, green): for low light.
- Permanent (red and black): stays visible after weeks of weather.
- Permanent Staining (indigo blue, crimson red, midnight black): withstands months outdoors.
Fine Homebuilding’s layout chalk guide says the same thing from the painter’s side: blue has low permanence and is best on drywall, “where more permanent colors, like red, can bleed through paint that’s applied later.” Muralists agree in practice. Pandr Design Co. finds blue the easiest to paint over, and black messier.
The trap is the shorthand “use blue.” Irwin’s Permanent Staining line includes an Indigo Blue. It looks like ordinary blue chalk in the bottle and in the line, and it is built to last months. Read the label, not the color. For a grid that will sit under light paint, Dust-Off or Standard is the right chalk. And snap with a light touch: a line that is visible is enough, and every extra layer of chalk is something the first coat has to cover.
Label every square
Label the squares on the wall the same way as on the design: letters along one axis, numbers along the other, so every square has a name like A1 or D7. Write the label small in a corner of each wall square. The Georgia Chalk Artists Guild recommends exactly this for confusing references, marking the reference and the surface the same way.
It matters more on a wall than on any canvas. From a lift you see four or five squares, not the whole grid, and the design you are copying is in your hand or on a screen. “D7” is a coordinate you can find instantly. “Third square from the window, second row down” is how a mural ends up with an eye one square to the left.
The doodle grid, the modern alternative
The doodle grid, also called the scribble, squiggle, or lazy grid, replaces the measured squares with random marks. You scribble letters, stars, and shapes across the whole mural area, photograph the wall straight on, lay the design over the photo in Procreate or Photoshop at low opacity, and then draw the design on the wall using the doodles as landmarks: the line passes just under the star, through the loop of the S.
Nobody seems to know who invented it. Beautify Earth’s overview of mural transfer techniques says only that it “became popularized once artists started using Photoshop,” and no source we found credits a person. It is now used at serious scale: Joey Allen and Leo Rucker used a doodle grid on a 28,000 square foot mural in Winston-Salem, North Carolina.
Hellmann’s assessment is the most balanced. The doodle grid is quick, needs no measuring, and gives you “more points to go off of than a traditional grid,” which suits organic shapes and portraits. In exchange you need a tablet or laptop on site, a clean straight-on photo of the wall, and several coats of light paint to hide the marks. She marks with acrylic spray paint, because chalk and pencil often do not show up in the photo. For lettering, architecture, and anything that has to be exactly straight and proportional, the square grid is still the better tool.
Common mistakes that ruin a mural grid
Most mural grids fail in a handful of predictable ways. Avoid these and the method is close to foolproof.
- Measuring from the floor or the ceiling. The grid inherits their slope. Snap your own level datum.
- Measuring square by square. Small errors add up across the wall. Read every mark from one origin.
- Gridding a design that is not the wall’s shape. Every square becomes a rectangle. Crop the design or leave a margin first.
- Choosing the square size by the wall. Coarse squares turn faces into guesswork. Size the squares by the finest detail, or subdivide only where it is needed.
- Red, black, or “blue” permanent chalk under light colors. It bleeds through. Check the permanence on the label.
- Skipping squares at windows and doors. The count shifts and everything after the opening is off by one.
- No labels. You will lose your place the first time you come down the ladder.
- A partial edge strip you forgot about. If the square size leaves a fraction, mark the partial column on the design too, or the last column of the mural will be squeezed.
What the history of murals adds
Muralists have always solved the wall’s problem away from the wall. Thomas Hart Benton’s first preliminary sketch for his mural at the Truman Library, a gouache of the whole wall titled “Truman Mural 1st Preliminary Cartoon 58”, is described in the library’s catalogue as “marked off in pencil in 13/16 inch squares”. The grid was ruled on the small design, so it could be scaled up square by square, exactly the planning step described above.
Renaissance fresco painters used full-size cartoons instead, pricked along the lines and pounced with charcoal dust. Raphael’s cartoon for The School of Athens, made around 1508 and now in Milan’s Biblioteca Ambrosiana, survives for a revealing reason. According to The Art Newspaper, it was perforated “only to create another cartoon that was destroyed during the transfer process.” The original was used to make a working copy, the copy was sacrificed to the wall, and the original survived. Five centuries later the lesson still applies: the reference that goes up the scaffold gets dusty, wet, and torn, so bring a copy and keep the original. For the longer history of squaring up, from Egyptian proportion grids to Dürer, see the complete guide to the grid method.
How Overgrid plans a mural grid
The planning steps in this guide, matching the design to the wall and working out the squares in real units, are what Overgrid does on a phone, tablet, or computer.
Crop to the wall. Open the design and crop it with a custom ratio: enter the wall’s own width and height, such as 640 and 280, and the frame matches the wall exactly. Cropping is free.
Canvas size mode. Enter the width of the painted area and the square size, in centimetres or inches. Overgrid locks the height to the design’s proportions, so after a crop to the wall’s ratio the height comes out as the wall’s height, and it shows how many columns and rows fit, for example 16 by 7 squares. If you are leaving a margin instead, enter the height of the wall and the width follows. When the count is not a whole number, it shows the fraction, so you know a partial column is coming before you measure anything. Canvas size is a premium feature. On the free tier you set the rows and columns yourself, which works just as well once you have done the division on paper.
Labels that match the wall. Numbering labels every square in the same scheme you chalk on the wall, rows by letter and columns by number, A1, B3, D7. Diagonals put an X through every square, the quick way to get extra crossing points in a detailed area. Both are free.
A grid you can read on a busy design. Adaptive color, a premium feature, picks the line color against what sits under it, so the grid stays visible across a dark sky and a white wall in the same image. On the free tier you choose from preset colors and can add a contrasting outline to the lines.
A reference that holds up on site. Save or share the gridded design at full resolution with premium, to print for the scaffold or send to everyone painting with you so the whole crew works from the same squares. Free saves are smaller, sharp on a phone and soft as a large print. And while a project is open in the grid view, the screen stays on, so the reference does not lock every few minutes while you have a brush in one hand and a ladder in the other.
Overgrid is free to download and use. Premium is a one-time purchase, never a subscription. There are no ads and no account, and your designs stay on your device. It runs on iPhone, iPad, and Mac and on Android, and one purchase covers every device on the same store account. If you want to compare it with the other grid apps first, the best grid apps for artists reviews seven.
The short version
Plan the grid on paper in real units. Make the design the shape of the wall, by cropping it or by leaving a margin. Size the squares by the finest detail. On the wall, snap one level line and one plumb line, measure every mark from them, check the diagonals, and label every square. Use a chalk you can paint over, and read the label, not the color. If you are still choosing between a grid, a projector, and a pounce pattern, how to transfer a photo to canvas compares the methods side by side.